Uploadcare doesn’t have an official plugin/integration for Marketo, but it’s possible to add the Uploadcare file uploader using the technique described in this article by Jon Bourne from http://digitalpi.com
High-Level Overview
Basically, the solution consists of these steps:
- Set up an uploader widget on a third-party service.
- Create a custom Marketo landing page template.
- Add some Javascript to transform the hidden form field to a file upload widget.
- Create a custom field in Marketo where we will store the uploaded file URL.
- Create a Marketo landing page from your new template and a form with a hidden field.
Get the Upload Widget
-
Create an account with Uploadcare and click the verification link in your email.
-
In your new Uploadcare account, create a new project and configure the upload widget.
- Disable any services from which you don’t want to receive files (such as Flickr).
- By default, users can upload only one file, but it can be any type of file—DOCX, PDF, VSDX, JPG, etc. It’s best to leave these settings as they are. (If you experiment with multiple files, I’d love to hear how it went!)
-
Under the Widget section, we’re going to use the Javascript code from the Widget to page box but you can ignore the others–we’re going to use custom code instead.

Create the Landing Page Template
Remember that Javascript code from Uploadcare that we looked at earlier? Now we’re going to add it to the landing page, plus one more custom Javascript snippet to make it work with a Marketo form. This is the hardest part if you’re not used to working with code, but we’ll walk through it step by step. Hang in there!
- In Design Studio, find the landing page template you want to use for your file upload form, then clone it, naming it something like “File Upload Form” so you remember its purpose later. Creating a new template is necessary because we need to place some Javascript code after jQuery is loaded, and it is often loaded near the bottom of the page. In case that’s a new term for you, jQuery is a Javascript framework that enables cool functionality—like adding file upload widgets!
- Add the Uploadcare Javascript code to your landing page template.
- In Design Studio, edit your new File Upload Form landing page template.
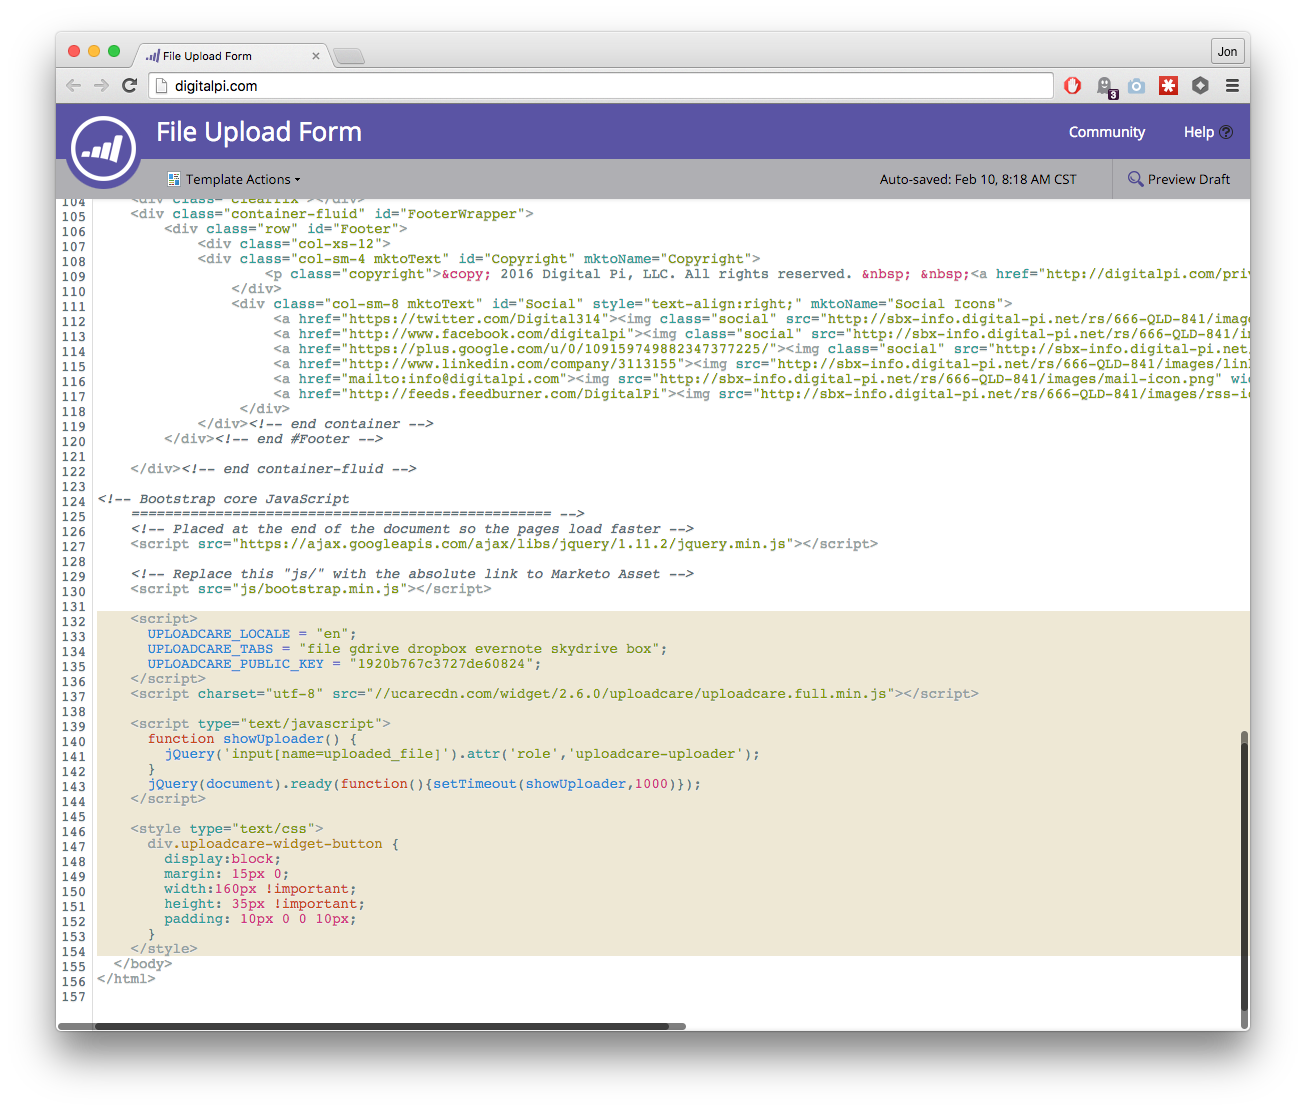
- Paste your Uploadcare Javascript code just above the tag at the very bottom of the landing page code.
- Don’t save the template just yet.
- Add custom Javascript code to make the Uploadcare widget work with a Marketo form.
- Copy the Javascript code below. It essentially transforms the hidden form field that we placed in the Marketo form to the Uploadcare file upload widget. If you chose to use a different field than the Uploaded File field that we’re using in this example, then you will need to change this code accordingly where it says “name=uploaded_file” to whatever the name of your field is. Paste this code beneath the Uploadcare code that you pasted in Step 1 above but before the closing tag.
        <script type="text/javascript">
           function showUploader() {
             jQuery('input[name=uploaded_file]').attr('role','uploadcare-uploader');
           }
           jQuery(document).ready(function(){
             setTimeout(showUploader,1000);
           });
         </script>
- Add styles to make the upload widget look a little better. You can tweak these as you see fit, but this will get you started.
- Copy this CSS code and paste it beneath the last Javascript block.
    <style type="text/css">
       div.uploadcare-widget-button {
         display:block;
         margin: 15px 0;
         width:160px !important;
         height: 35px !important;
         padding: 10px 0 0 10px;
       }
   </style>
- The last 20 or so lines of your template before the
<body>tag should look something like this.

- Approve and Close this template.
Putting the Pieces Together
Okay, let’s make some magic happen. The setup in Marketo requires several things: a form (duh!); a landing page where the form lives; a string field where you can store the URL of the uploaded file.
- Figure out what Marketo field to use to store the URL of the file that is uploaded. In this example, we’ll use a custom String field called “Uploaded File”. You will likely need to create this field, or you could use a temporary field that we’ll overwrite later.
- Create a form. It can be as complex as you like, but our example only has three visible fields—First Name, Last Name, and Email Address.
- Add the Uploaded File field to the form, and set its Field Type to Hidden.
- Approve and Close the form.
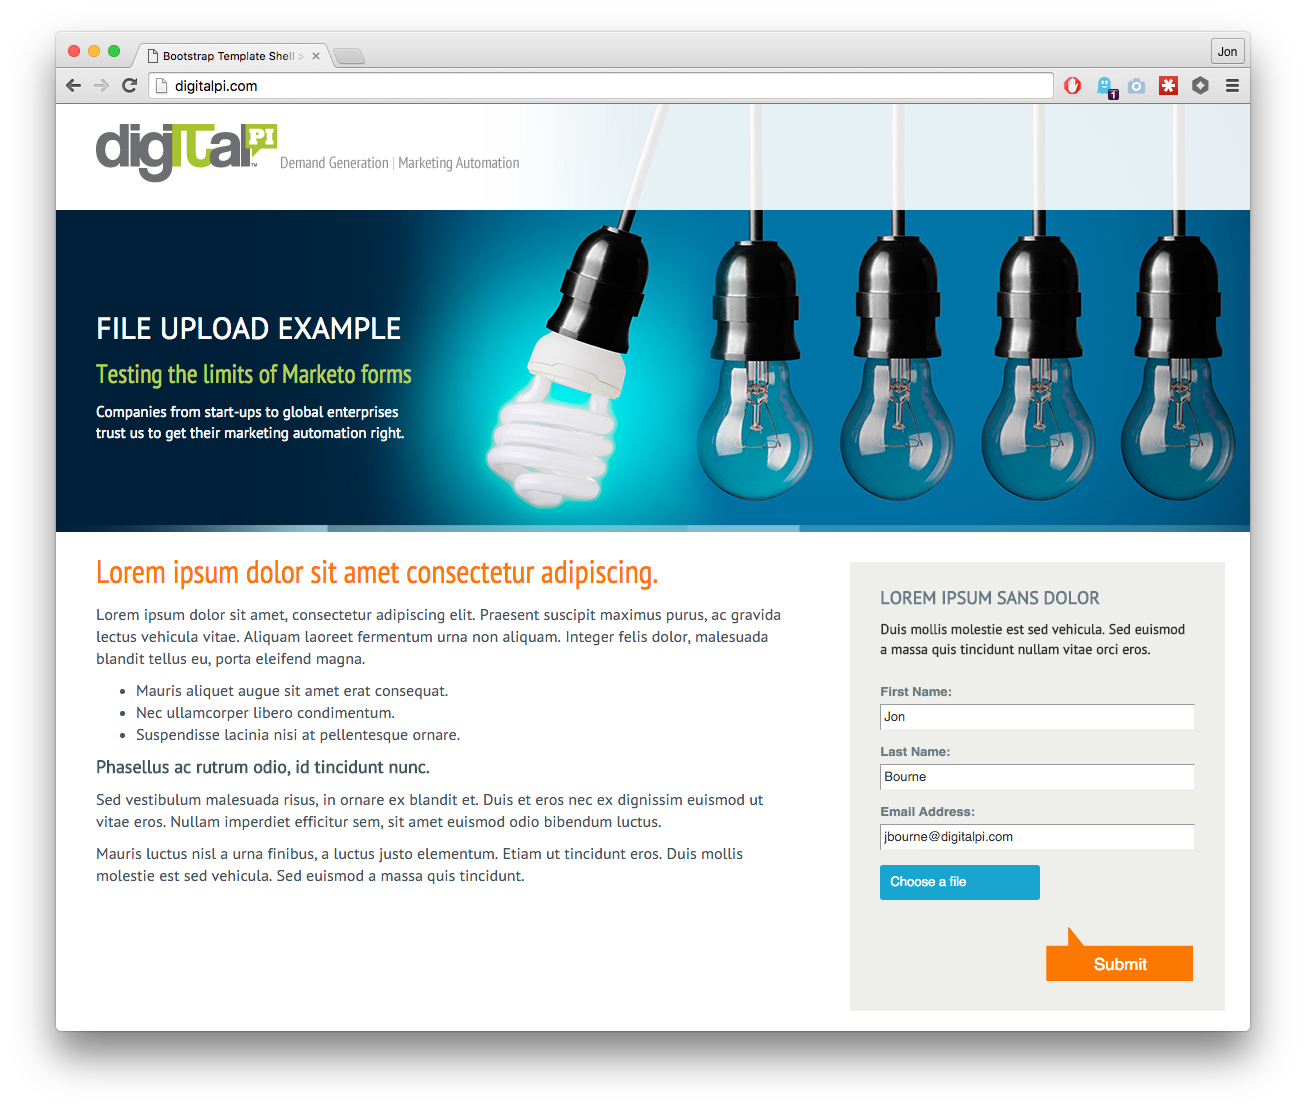
- Create a new landing page from the File Upload Form template. Add whatever copy and images make sense for your purposes.
- Add the form we just created to the landing page, as you normally would.
- Approve and Close this landing page.
Try It Out!
Now the fun part—seeing it in action! Let’s give it a shot in the browser.
- Select your page in Marketo and click the orange View Approved Page button.
- You should see your new landing page open up with your form. After a moment, you should also see a box show up in your form that says “Choose a file.” If so, your integration worked!

- When you click on that box, you’ll see a drag-and-drop interface for uploading a file along with any other upload options you left checked when configuring the Uploadcare widget.
Best Practices
While this is good as a proof of concept, there are a few other things to consider when using this technique in a production environment.
- First, when you upload files from a Marketo form, it’s probably best to move this data from the Uploaded File field and put it somewhere that it won’t be overwritten if the person uploads a new file. I recommend using {{lead.Uploaded File}} in a Flow step to write the uploaded file URL to an Interesting Moment.
- Next, this upload widget might not work for everyone in every browser. Post instructions for sending a file separately (probably via email) for anyone who has trouble with the form.
- Finally, you will probably want to involve a web developer to help customize your upload widget further to better match your brand identity.